
Latest Updates
No matter how well you maintain it, it’s only a matter of time that our damp climate and salt-strew winter roads eventually catch up with your vehicle. When rust starts to form on your car, truck or SUV, you will need to address the issue promptly to extend its lifetime. Here’s how!
Step #1) Prepare Yourself
Carve out time in your schedule (approximately a whole day) that your car won’t be needed. There can be a waiting period between priming and painting, so make sure that your vehicle is either protected in a garage or the weather outside is overcast.
To avoid any delays once you start the rust repair process, make sure you have all of the proper supplies needed. Purchase sandpaper, primer, masking tape, poly sheeting, a tack rag, polishing compound and the appropriate touch-up paint and clear coat.
Step #2) Prep the Area
Use poly sheeting or masking tape and newspaper to protect your vehicle from paint overspray. Keep a couple of inches of space exposed between the edge of the rust spot and where the mask begins.
It’s important not to skimp on this step. Spray primer and paint mist can travel great distances through the air, so it’s better to be safe than sorry when prepping your vehicle.
Step #3) Remove the Rust
Using sandpaper, a sanding block or power sander to remove the rust and expose the bare metal. Sand a little bit outside of the actual rust spot so that there is adequate space for feathering the edges. If there are any particles on the unmasked area, use your tack rag to remove them.
If the rust has left holes or pits in the metal, fill them with body filler.
Step #4) Prime the Surface
Use a grease-cutting dishwashing detergent followed by rinse water to clean the prepped area properly. Let it dry before wiping the area with a lint-free cloth.
Apply epoxy primer to the area, followed by a filler primer. Complete two to three medium coats of the primer (following the appropriate wait times in-between coats) until the entire repair area is covered.
Step #5) Apply the Paint
Begin the painting process by applying a coloured base coat. Hold the spray can about 12 inches away from the surface and move your arm left to right, overlapping each pass.
Slowly apply colour in two to three coats into the repair and the surrounding areas, allowing for proper drying time in-between coats.
Step #6) Apply the Clear Coat
Once the paint is fully dry, follow the directions on the clear coat paint can. Apply several coats of clear coat, ensuring each coat is smoothly applied to avoid noticeable drips.
Instead of fixing the rust on your vehicle yourself, why not trust the professionals at Waterdown Collision? Contact us today to learn more about our high quality, fully guaranteed repair services
What Our Customers are Saying!

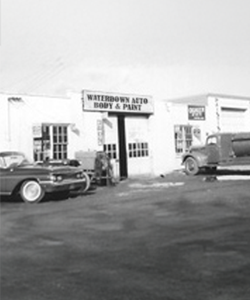
Waterdown Motor & Welding Service. Where it all began.
1974 – 1988
1988 – 2026
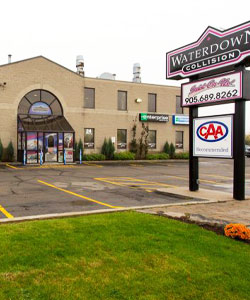
For decades, this location has been a trusted place for Waterdown drivers — where experience grew, relationships were built, and our reputation was shaped.
Summer 2026
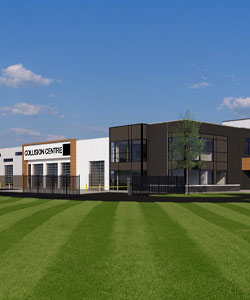
Our next chapter begins here — a new, purpose-built facility designed to support the future of Waterdown Collision while keeping our roots firmly in the community. Opening Summer 2026.
The Journey Continues
From where we began to where we’re headed, our story is still unfolding.